Looking to purchase Bluehost hosting on your blog or website in 2023? Bluehost is a leading web hosting provider.
Bluehost is the most trusted web hosting provider today, hosting more than 2,000,000+ websites.
Bluehost offers marketing training, SEO services and social media marketing. They also offer graphic design services, email domain names, local business listings, and content creation services.
This tutorial will show you how to purchase hosting from Bluehost. You will learn how to buy hosting from Bluehost by the end of this post.
Why Choose Bluehost to Host Your Website?
But now, a question arises, Why Choose Bluehost?
Bluehost hosting is the best choice because it is affordable and offers high-speed performance.
There are many Bluehost alternatives on the market. But, if you’re starting and need a host that is suitable for your business, Bluehost is the best choice.
Bluehost offers a variety of products and services to help you start your website or store online. These include shared hosting, WordPress hosting, web builders tools, and WordPress hosting.
You can also find Bluehost site examples that are using Bluehost hosting. They are performing extremely well in search engines.
Bluehost gives you a domain free with all hosting plans. You will also get web hosting plans starting at $2.95 per month.
The plan offered a free domain and a free SSL certificate. One-click WordPress installation, 99.9% uptime guarantee and many other features.
Reasons To Buy Web Hosting from Bluehost
WordPress.Org recommends Bluehost hosting. Bluehost hosting is the best choice if you want to create a website or blog.
These are the top reasons to purchase hosting from Bluehost
How to Buy Hosting from Bluehost?
The following steps will be helpful if you’ve decided to purchase Bluehost hosting. Bluehost’s hosting plans, and pricing offer the best value for creating a budget-friendly website.
It’s easy to buy a hosting web package these days.
Follow the instructions below to purchase a Bluehost hosting plan in 15 minutes.
Step 1:
Go to the Bluehost Official Website
First, visit the official Bluehost website by clicking here. Once you have landed on the site, the Start button will appear.
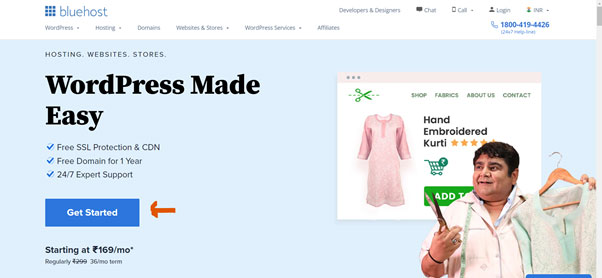
Click on Get Started button for further steps.
Step 2:
Select a Hosting Plan
Next, choose the Bluehost plan that best suits your needs. Bluehost hosting has four plans: Basic to, Plus, Choice Plus and Premium.
Because you can host multiple websites with this plan, I recommend you choose the option plus plan.
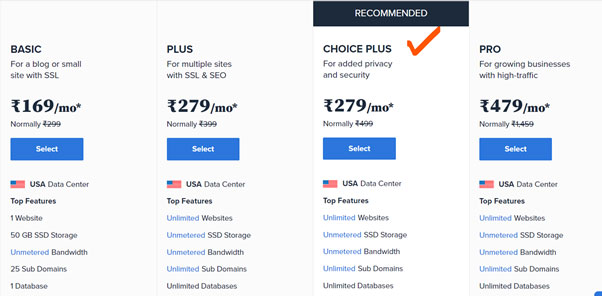
The Bluehost Basic plan is recommended for those who are just starting. You can also choose the Basic plan when you register with Bluehost.
It only costs $2.95 per month if you buy the maximum amount of months this plan offers. Only one website can be hosted with constrained SSD storage.
If you need unlimited SSD storage and unlimited website hosting, the Bluehost Plus plan is for you.
The Plus plan also includes Free Office 365 for 30 Days.
Bluehost’s most popular plan is Choice Plus. For 30 days, you get free automatic backup, office 365 and domain privacy.
Thanks to the daily automatic backup, you can restore your website anytime.
The Pro plan is right for you if you own a large site or make a lot of money. The Pro package includes an IP dedicated to you, automatic backup and domain privacy.
You can upgrade to the pro plan if your website receives more traffic.
We recommend Bluehost’s Basic Plan if you are a beginner and need to start with one domain. To avoid expensive yearly renewals, you should always buy hosting for the longest time possible.
Step 3:
Choose Your Domain Name
Now you can go to the domain page after choosing to host. Bluehost’s best feature is that you get a free domain name for a year.
On the left side, you will see ” create new domain” and ” use domains that you already own”. You can enter your domain name in the right box if you already have it.
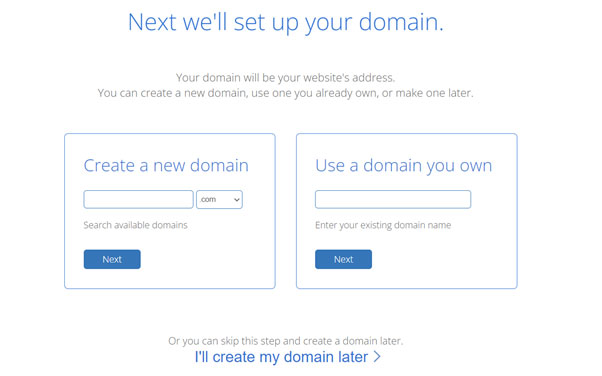
You will need to choose a perfect domain name for your website. Then, enter the box to create a new domain.
Click the ” I will create my domain later” button to choose your domain name later.
Choose a domain name, as this is the most preferred domain extension. It all depends on the type of website you are trying to create.
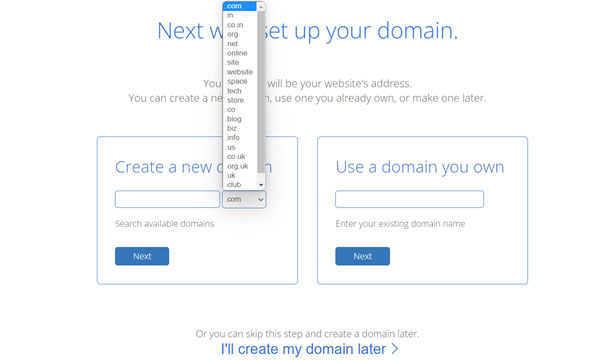
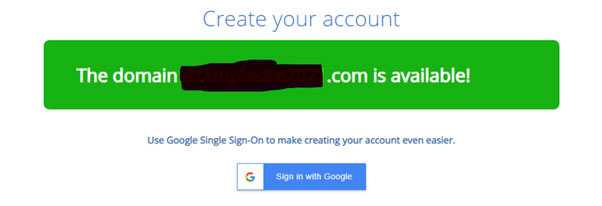
Bluehost will inform you if your domain is available once you have chosen the domain and extension you want.
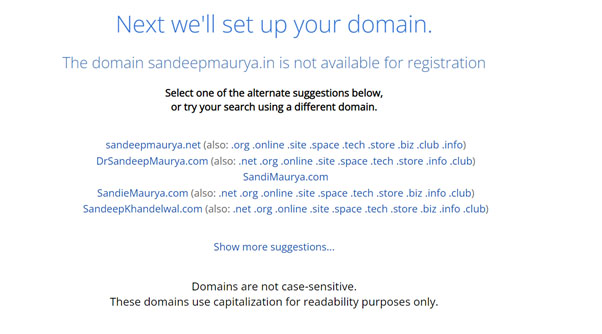
It will recommend alternative domain names if your chosen domain name is unavailable. You can choose a different name or opt for an alternative.
You have successfully chosen your domain name when purchasing hosting from Bluehost.
If you purchased your domain name through another company, you’d need to modify the nameservers to point it to Bluehost.
Bluehost’s support team can also assist you, offering 24/7 customer support.
Step 5:
Choose Your Package Information
You must select the Bluehost term you wish to purchase your hosting.
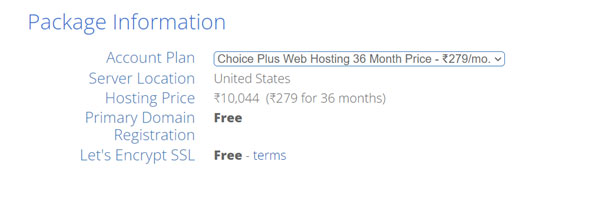
There are three options: a 12-month, 24-month or 36-month plan. To avoid renewal fees, choose the hosting plan that will last for the longest time. Bluehost will provide a complimentary SSL certificate.
Step 6:
Choose Package Extras
Next, you can upgrade your web hosting by adding more add-ons. Every hosting provider has a different set of add-ons for their plans.
Any of these add-ons can be selected or deselected.
These add-ons are included in Bluehost hosting.
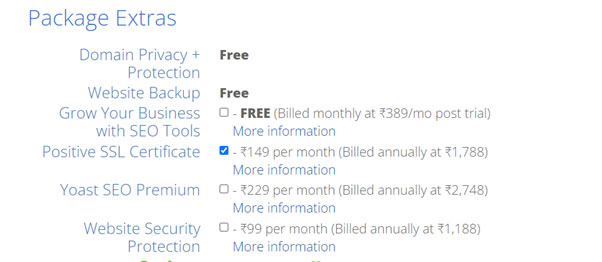
Experts would rather have free SEO alternatives like Google Webmaster Tools & Yoast SEO WordPress plug than purchase this extra service from Bluehost.
Sitelock protection is a must-have to protect your website against malware and attacks.
It protects your website against being added to blacklists of search engines and avoids costly downtime. It downloads data from your website, scans for malware, then uploads the cleaned files.
Step 7:
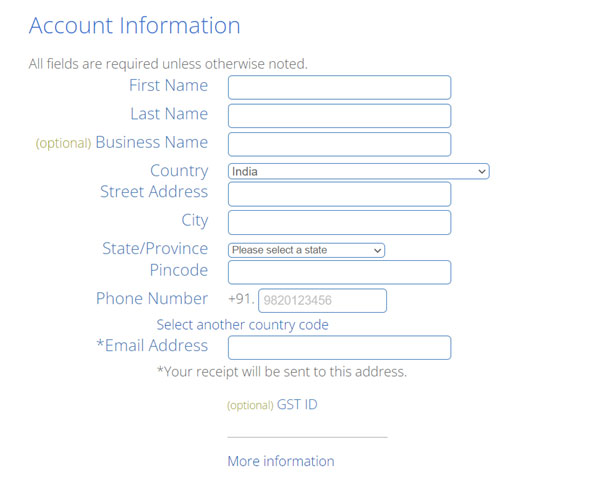
Enter Payment Information
Finally, we have reached the end of our How to Buy Hosting from Bluehost guide.
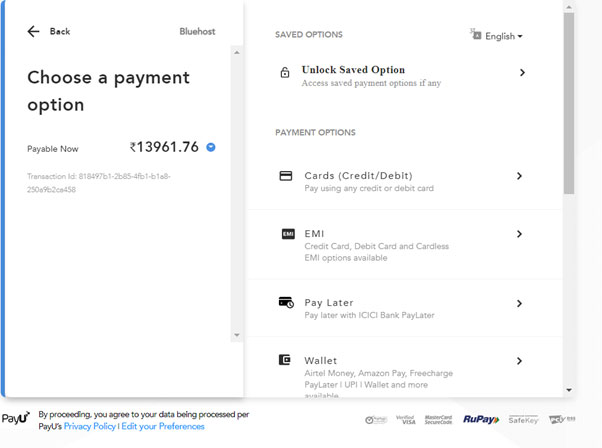
Now choose your payment gateway how you can pay , you can use your credit card or debit card to pay for hosting
After filling out the billing information, click the green submit button to accept the terms.
Congratulations! You have successfully bought your Bluehost hosting.
You will now receive emails from Bluehost containing the login details for Bluehost cPanel.
If you have received your Bluehost domain name, you will receive an email confirming that you must activate your domain.
If you buy your domain name through another company, don’t bother with this step.
Bluehost will now ask you to create a password. Click the Create Your Password button to be taken to the page where your WordPress password can be created.
Once you have entered your password, check the Bluehost terms & conditions box to continue the process.
Congratulations! You have completed the steps in my How to Buy Hosting from Bluehost guide. You can install WordPress on your website and create a beautiful blog with Bluehost hosting.


