Bluehost is not the right hosting service for everybody. They provide slick designs and ease of use but strive to be imperfect in only some areas. If Bluehost is the right hosting service for you, look at my full review.
In this article, I will show you how to add a domain to Bluehost. I did some research so that you spend less time on it, and all the screenshots and details are provided for each step. Let’s get started.

Connecting Your Domain
Your domain name is attached to your new hosting account. They’ve already been connected if you purchased your domain name from Bluehost during the signup process. Then you don’t need to do anything.
If you’re like me, you bought your domain name from another company. In my case, it was Namecheap, so the screenshots are from there. The options may be slightly different if you use another company, but the principles remain the same.
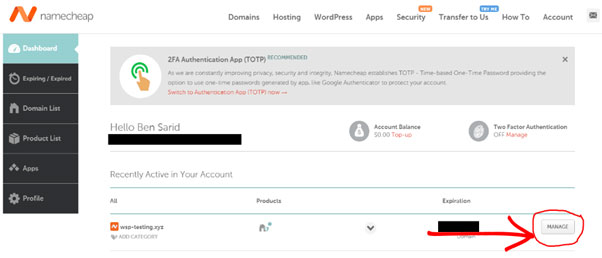
When I log into my Namecheap account, the tab on the dashboard is My Domains. You should navigate to Domain List or something similar with your specific domain registrar.
Click on Manage Button

When you click on the manage button, it will open your domain’s settings page. This may look different, but you need look for the same thing: NameServers.
From the Nameservers section, select Custom DNS from the drop-down menu.

1. Enter your Bluehost nameservers in each line
2-: When you’re done adding them, press the green checkmark to save changes

I have mentioned below the Bluehost nameservers. You can find them in the knowledge base or by contacting customer service.
- ns1.bluehost.com
- ns2.bluehost.com
The domain is now connected! Although it only took me two minutes, they need to propagate throughout the internet now that the changes have been made. This propagation may take ten to twenty minutes or 24 to 48 hours.


